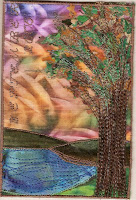
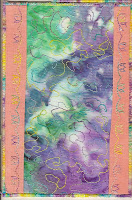
Fabric Post Cards are a super-fun way to experiment with colours and techniques.


Really, all you need to do to begin is start with some fabric – just quilting over a great print results in a fun Post Card. After you make a “front” you can piece or applique or thread play or whatever on it and there is still only 24 square inches of textile Real Estate to cover.
How to finish it up? Simply fuse it to a stiffener like Peltex, TimTex or even the $.49 a meter drapery buckram from Fabric Land, prepare a Post Card-like “back” complete with a line down the center, your return address, a “to” address space, a place for a stamp and the word “POSTCARD” clearly marked on it.
Attach the 2 pieces together, closing in the raw edges with a satin, zig zag or buttonhole stitch, write out your card, stick on the stamp and ask your friendly Postal Clerk to “hand cancel” it and drop it into the mail. The recipient will love you!!
All right.. if this short “how-to” does not give you confidence then please go visit DebR’s photo tutorial on “how to”. It is the most inspiring and fun set of instructions that I have seen on the internet
And why am I suggesting this?
We are going to have a Post Card Mail Box at our quild meetings. So feel free, have fun and SAVE on POSTAGE! You can start your own collection of miniature Quilt Art.
Simply bring your very own post card creation to the guild meetings monthly for this year and drop it into the “Mail Box” during the meeting. At the end of the meeting everyone who has “mailed a card” can reach into the mail box and pull one out.
UPDATE: Please put your return address on your card and the Guild will play Post Office, stamp it and mail you a Fabric Postcard in exchange.
P.S. If you “click” on the photos they should enlarge to full size so that you can see them better.
