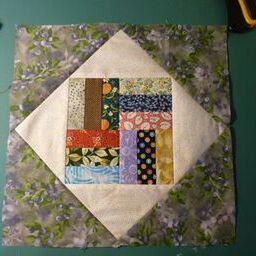
This is the first set of instructions for the LFQG Blog Sampler. In this post I’ll give the instructions for the sampler square, as well as putting the whole block together. For the rest of the squares, I’ll give you the instructions for the sampler section, and then refer you back to this page for how to put it together into the finished block. This instruction sheet shows the setting triangles as dark on the outside and light on the inside. Please note that this will change every other block. The colouring for the setting triangles will be shown for each block in the finished block photo at the beginning of each page.
This week’s sampler block is named “Roman Square” in Block Base.
Cutting:
Cut 12 rectangles of various fabrics measuring 1 1/2 inches x 3 1/2 inches.
Block Assembly:
Sew these rectangles of fabric along the long length into sets of three.
Arrange these sets as shown in the photo and sew together. Your block at this point should measure 6 1/2 inches.
Finish Assembly:
Press towards the triangles. Take the other two 5 1/8 inch triangles and sew to the remaining sides.
Take two of the 6 7/8 inch triangles and sew to opposite sides of your block.  Press towards the triangles.
 Press towards the triangles.
Take the remaining 6 7/8 triangles and sew to the other opposite sides.  Press towards the triangles.
 Press towards the triangles.
Your block is now finished, and should measure 12 1/2 inches square.


